Review of “The Perfect Portrait Collection” by Sleek Lens
- At January 19, 2018
- By farrahwelch
- In photographers
 0
0
I was contacted by Sleek Lens to review their portrait workflow action set – The Perfect Portrait Collection
As an avid Photoshop user, I don’t incorporate outside actions into my standard workflow, but I was excited to have a little fun playing around and reviewing this product for them.
Overview
At the time of this review, The Perfect Portrait Collection is regularly $120 but on sale for 39.00. It has 56 actions for retouching skin, light, eyes, hair, and much more.
At first glance after installation, you’ll see that they entire set is nicely organized with separate categories, making it very easy to navigate. It also has has built in warnings and instructions, guiding you along the way. This is really useful, and makes the sets fairly self-explanatory.
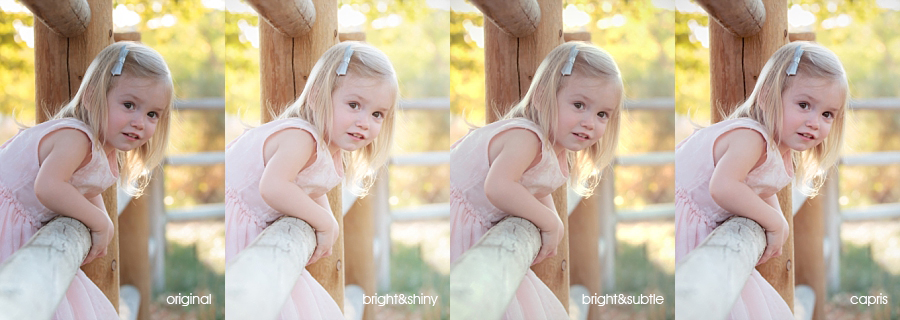
The first category is the ALL-IN-ONE section. These are preset looks for the overall image, built for the person looking for one-click actions. These actions flatten the image when complete, so you don’t have control over any of the details. They are a one and done deal. Here are a few examples from the set.
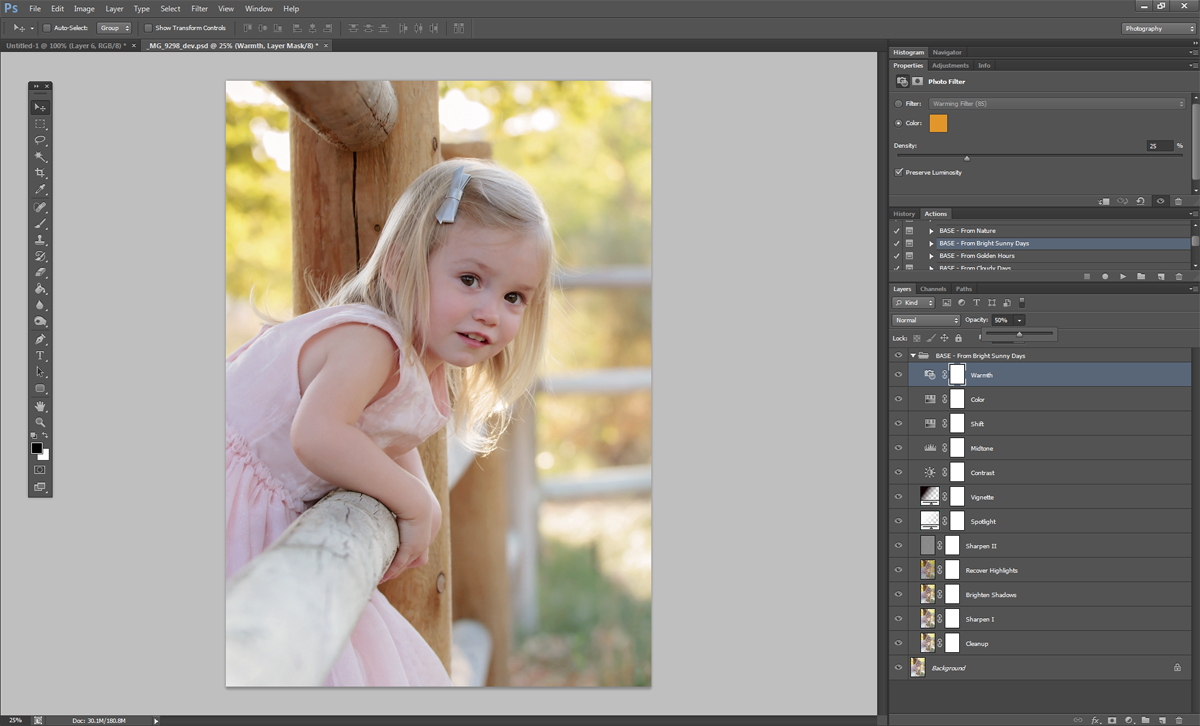
The next category is the BASE section. This section creates a base look to start with. These are not flattened, and each layer is labelled well, so you can go in and edit and change the layers to your liking. These are good for photographers looking for a set look but want to have some fine control over the final look. You can see below that you can control the individual layers.
The next sections are for adjusting EXPOSURE, TEMPERATURE, and COLOR CORRECTION. These are great for a photographer that doesn’t know how to control these elements on their own, or others that are looking for a quick way to add these adjustments to their workflow. The actions create non-destructive adjustment layers, and you can add as many as you like without flatting your image. They are created with layer masks so you can paint on your adjustments as needed.
The PORTRAIT RETOUCH section is full of nice actions for whitening teeth, brightening the eyes, adding some sparkle, sharpening details, nice glowing skin tones, and soft glossy lips. All labelled well with instructions, so it’s easy to figure out.
The ENHANCED TONES section is full of some really fun overall image tones that will help set the mood of your photo. You can run them all and turn them on and off to see what you may or may not like.
There are a few different VIGNETTES to play around with to enhance your image, including a navy, a brown, cream, and a vintage one.
The LIGHT GLOW section is really fun – its full of different colored glows, that would be great for enhancing bright background bokeh or making sun flares. And they are moveable to different portions of your photo, explained by one of the pop-up warnings before the action sets in.
The FROM A CANDY STORE section has a neat painterly effect, dodge and burn, frequency separation (all the buzz these days), selective sharpening, and an advance photo retouch that includes most of these in this category.
Lastly there is a quick WEB FILE PREPARATION action that makes saving out blog and social media photos really quick and easy.
Outdoor Portrait Test
After familiarizing myself with the action set, I decided to give it a try.
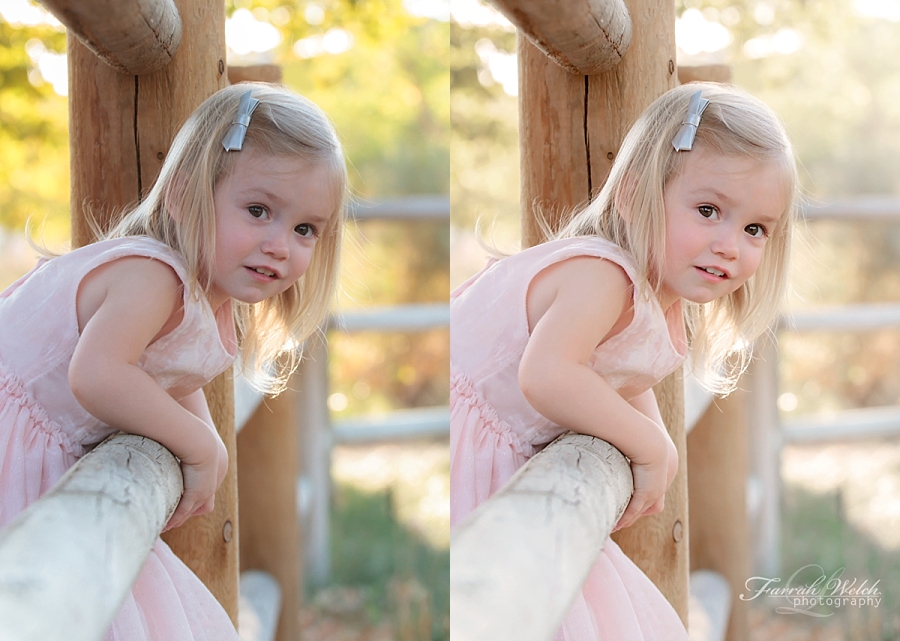
I started with the action BASE – From Bright Sunny Days and adjusted a few of the layers to my liking and flattened the image. I used the EXPOSURE bright action to raise exposure just a hair for a brighter feel, and warmed it up just a bit with the TEMPERATURE warmer action. I used the COLOR CORRECTION – cream yellow tone and painted it over the foliage in the background to get rid of the deep golds and make it look creamier in the background. I used the PORTRAIT RETOUCH fast retouch to brighten the eye highlights, whiten the whites of the eyes, whiten the teeth, add some blush to the cheeks, and add some detail to the lash line. I also used PORTRAIT RETOUCH glossy lips. I added ENHANCED TONES romantic dance as an overall tone change and LIGHT GLOW neutral in the upper right to finish it off. Here is the before and after:
Studio Portrait Test
After seeing the results on an outdoor image of mine, I decided to test it out on one of my studio images.
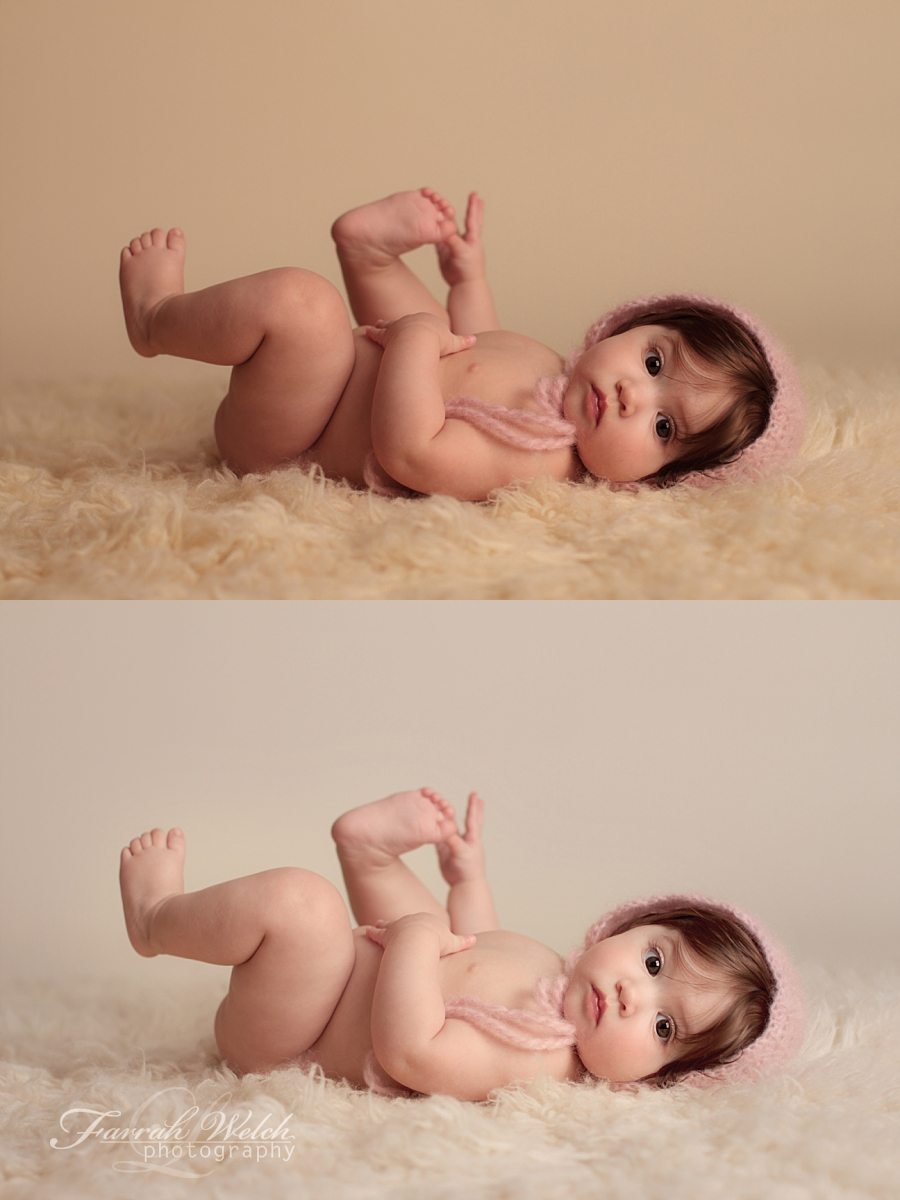
On this one, I brightened the EXPOSURE, then set the cream yellow tone COLOR CORRECTION. I used the PORTRAIT RETOUCH honey skin brush, as well as the PORTRAIT RETOUCH fast retouch for the eyes, lashline, and blush. I then added PORTRAIT RETOUCH glossy lips. Finally. I used the romantic dance under ENHANCE TONES and cooled the TEMPERATURE a bit. It was a really quick edit, and on my third try, it was really fast and easy to find everything and figure out what I wanted to use.
Conclusion
To sum up, this is a great overall portrait action set that is full of great actions to help you get the results you are looking for. If you are new to photo editing and want to get “the look” but don’t know how – check them out! Or if you are a seasoned editor looking for a complete portrait action set to speed up your work flow, give it a try! It’s definitely been fun playing around and exploring some new workflow tools.
Thank you to Sleeklens for providing the action set for review!
Links
Sleeklens Perfect Portrait Collection – https://sleeklens.com/
Sleeklens Photoshop Actions – https://sleeklens.com/product-category/photoshop-actions/
Sleeklens Blog – https://sleeklens.com/photography-blog/
